Create a new emissions source
Last updated April 22, 2026
You can create an emissions source with the Create button or when viewing a collection.
In the Emissions module while viewing a collection, use the Actions menu and select New Emissions Source.
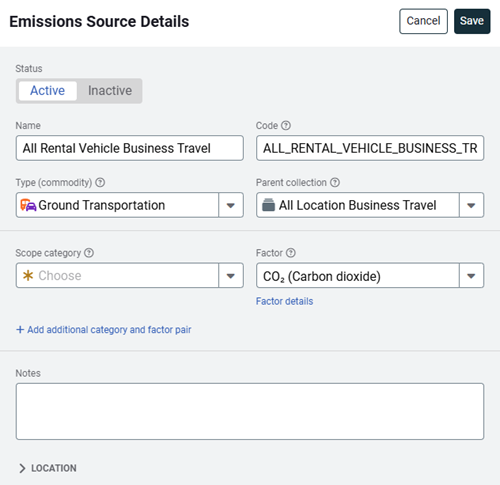
Complete the form to create a new emissions source.
- Enter a name.
- Accept the code given or update the code to match your organization's structure.
- Choose the type or create a new one.
- Choose the parent collection for this emissions source.
- Choose the scope category and factor. At the record level you can change these settings if needed.
- If needed you can add additional category and factor pairs.
- Add notes to help other users understand why this emissions source was created. You can use hashtags to group your emissions sources. You can use hashtags in searches similar to a custom filter.
- Adding location is suggested for any emissions source using the electric type (commodity). If location is applied, the appropriate eGrid factors are automatically selected for your electric emissions source.
Location is inherited from the meter, you won't see the address information until the emissions source is linked to the meter.
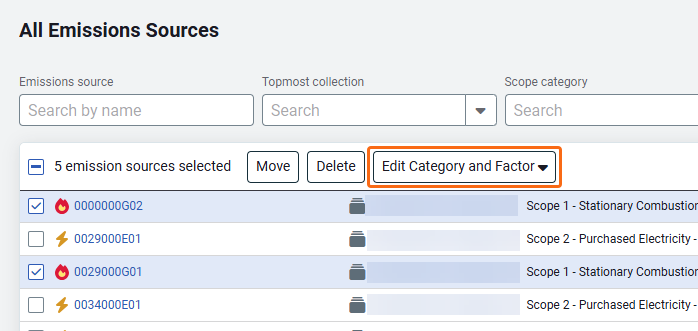
Edit emissions source categories and factors in bulk
You can select multiple emissions sources and edit the categories and factors in bulk. These updates can only be completed in the application and NOT with a setup spreadsheet. Updating the category and factor does not cause your historical emissions to be recalculated.
Example
- In the Emissions module, click All Emissions Sources, set your filters to find specific emissions sources.
- Select your emissions sources.
- Use Edit Category and Factor to update or reset to default.
Create multiple emissions sources with a spreadsheet
If you need to create many emissions sources you can use a spreadsheet. You can link multiple emissions sources to meters using this spreadsheet.
Link meters to an emissions source
You can link a meter to an emissions source.
Find your emissions source in the hierarchy and use the Actions menu to link a meter or manage the linked meter.
View and edit emissions source
To view the emissions source details:
- Click the Actions menu for the emissions source.
- Select Emissions Source Details.
- Update the status or the details.
- Save.
Inactive emissions source
- Are not shown in the hierarchy.
- Cannot have records added to them.
- Any existing record information for the emissions source is reported on.
As you make changes to your hierarchy, you can set outdated emissions sources as inactive. This lets you update your tree but maintain historical reporting.
Custom Fields
On the Properties tab you can manage custom fields for an emissions source. Custom fields let you store important information and documents related to each emissions source.
Assign a record to an emissions source
A record is the foundation of your emissions reporting, it stores emissions information (detailing the origin and quantity) as well as the method (use, cost, direct/offset) you are using to calculate greenhouse gas output.
You can add records to emissions sources by selecting the emissions source in the tree in the left panel or by clicking on the Actions menu from any records list.